Getting GPS Data into the ASCOM Driver interface of Gemini 2

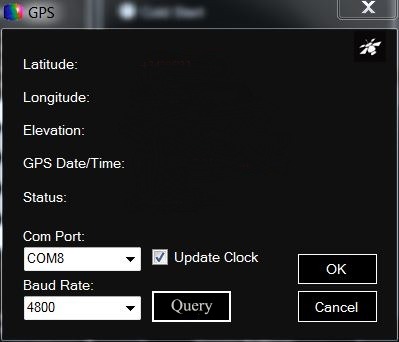
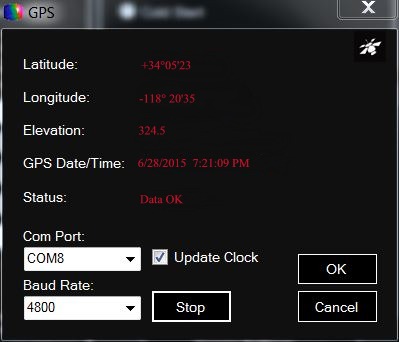
This guide will help you get the GPS data from a GPS connected directly to the computer into the Gemini.net ASCOM driver.  This can then be used to update the Gemini-2 mount controller,

Advantages of using a GPS connected directly to the computer.
  • Able to get the GPS data into multiple applications such as TheSky, Maxim DL and also the Gemini.net driver.
  • USB GPS units are usually much cheaper to purchase than units that connect directly to a mount.
  • Most ASCOM drivers for mounts support getting GPS data from the computer.  This means if you have multiple types of mounts that run ASCOM, then one GPS might work for all of them.
So lets get started. Now these instructions only cover configuring the GPS and sending the data to the Gemini 1 or 2 mount. 
 
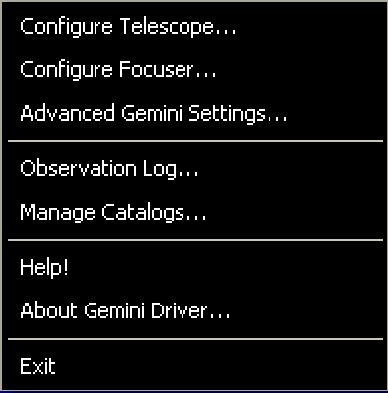
   1.     First Click on the Gemini-2 Icon on your Screen
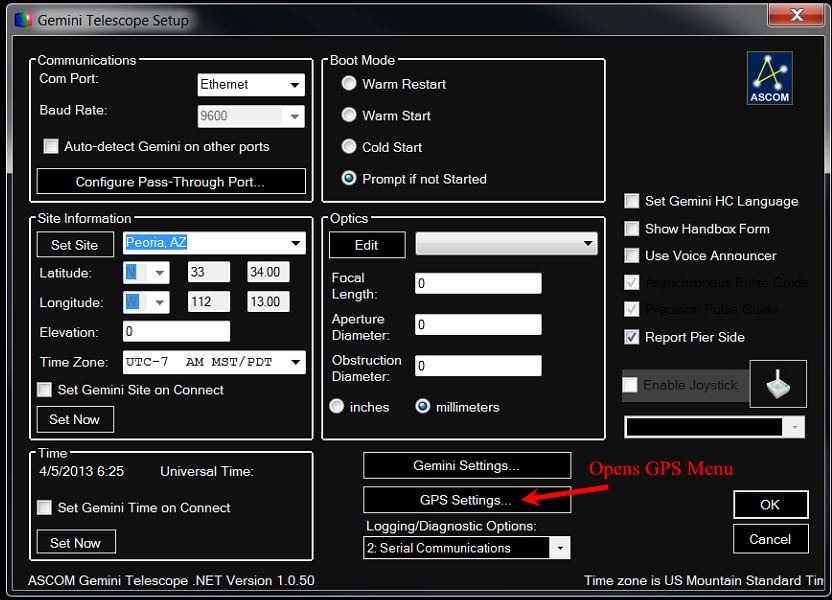
 
  1. First make sure you have connected the Driver to the Gemini.  Click the "Connect" button so that it says "Disconnect". Now click on the "SETUP" at the bottom Right of the MENU. This will bring up the next pop-up menu (Fig 2).


Fig. 1

  1. Select on "Configure Telescope" from this Menu which is the first selection


Fig. 2


Fig. 3
  1. Now click on the GPS setting box in the lower middle of the screen. The below menu should pop up.

  2. Fig. 4


  3. Now make sure that the correct Com Port is selected.
  4. Make sure the baud rate matches your GPS receivers baud rate. It it does not then you will get an invalid Data error.
  5. Now Click on the Query button to the right of the baud rate box.
  6. You should see the GPS data update as in the below figure.
    Check the "Update Clock" checkbox to have the GPS update the Computer's Clock also.


Fig. 5

  1. Now you can close the GPS window and use the Set Now button in the Set Site box and the Set Now button and the Set Time box to transfer the setting to the Gemini using the Configure Telescope Menu. See Fig. 6 below.
    Please note that you will have had to hit the connect button in the Hand Control Menu (Fig. 1), which If connected, the "Connect/Disconnect" button in Fig 1 will say "Disconnect"