Servo Programmer and Adapter

Now updating this firmware yourself will be at your own risk, and Hollywood General Machining, Inc. (Losmandy) or any one associated with them, or anyone associated with http://www.gemini-2.com will and can not be held liable if anything goes wrong. YOU DO THIS AT YOUR OWN RISK. I have provided the best instructions that I can, but there is absolutely no guarantee, that everything will work as expected.   If you want this firmware professionally installed you will have to contact Hollywood General Machining, Inc. (Losmandy) for cost and time estimates.     AGAIN, YOU DO THIS AT YOUR OWN RISK. Current shipping Gemini-2 have this firmware already installed.


Click on pictures to see a larger version.
  1. I used a PicKit 3 Programmer from Microchipdirect. Part number PG164130 at a cost of $44.95 plus shipping. They normally ship 2nd day FedEx.  I do not recommend purchasing any of the Chinese knock-off versions sold on ebay. It might save you a few dollars, but also might not program the servo firmware correctly.
  2. Downloaded the MPLAB software this version is V8.91  A user guide is available here
  3. You will also have to make an adapter.  Here is a picture of the parts I started with to make the adapter. This adapter has 2.54mm (0.1.00") spacing male pins on one end to go into the Pickit3 connector, and 2.0mm (0.079") spacing with small diameter pins to fit into the sockets on the Gemini-2 board.  This adapter uses 5 positions, to fit into the connectors of the Gemini-2. Please note that not all Gemini-2 boards was shipped with sockets.  If your board does not have the sockets, then you will have to try and find 2mm pin sockets, and install them yourself. (not recommended as the circuit might have the holes filled with solder.)

PicKit 3
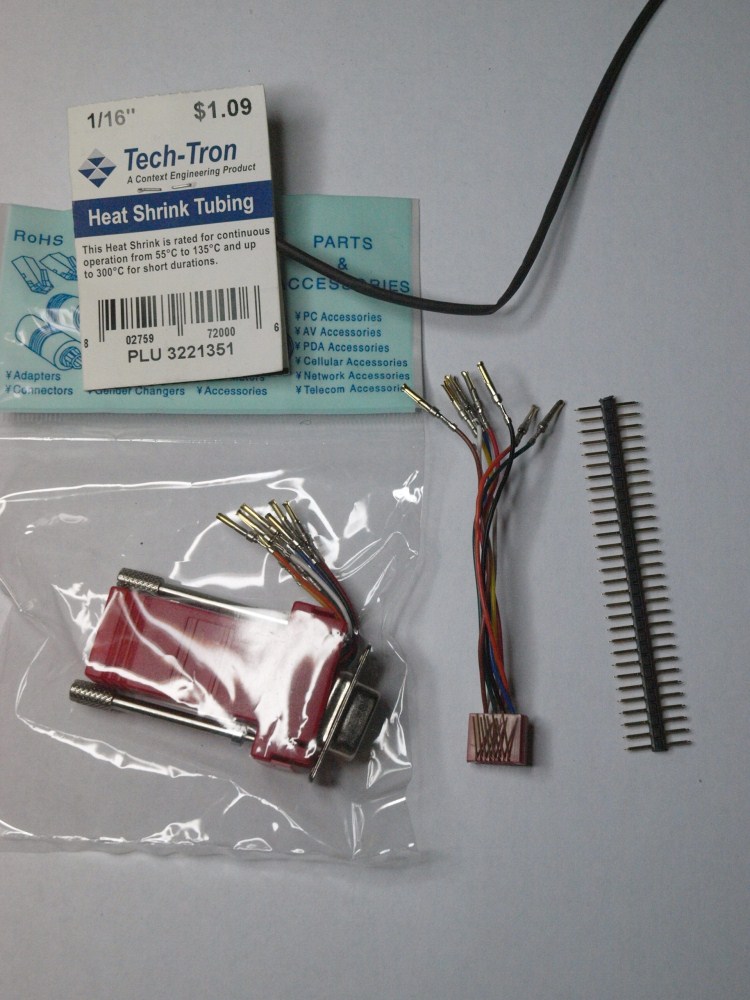
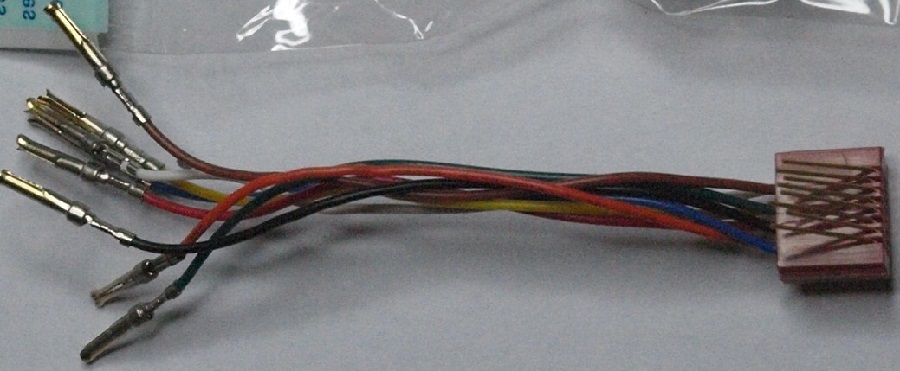
Fig 1
  1. I started with a Female RS-232 to RJ45 adapter, that I purchased from my local electronics supplier. I also got 1/16 diameter heat shrink and a double .100 inch breakoff tab header.  Use a small screw driver to push out the wire assembly you see between the bagged RS-232 to RJ45 adapter and the .100 inch breakoff headers from the RS-232 to RJ45 adapter.  If you don't have a local distributor that carries these then cablewholesale sells them in many different colors.  Just make sure you get the Modular Adapter DB9 Female to RJ45 adapter. The heat shrink and double.100 breakoff tab header was from Fry's Electronics.  I don't recommend the DB9F to RJ45 adapter that Fry's Electronics sells as it does not come apart very easy.  The one from Cablewholesale does.

Fig 2
  1. The above picture (Fig 2) is of the harness removed from the RJ45 to DB9 adapter. Bend all the pins straight and pulled them out of the Red plastic end.  These pins are perfect diameter to fit the header J18 and J19 in the Gemini-2.  Cut the header strip  shown on the right of the top picture (Fig 1) to 6 pins long.
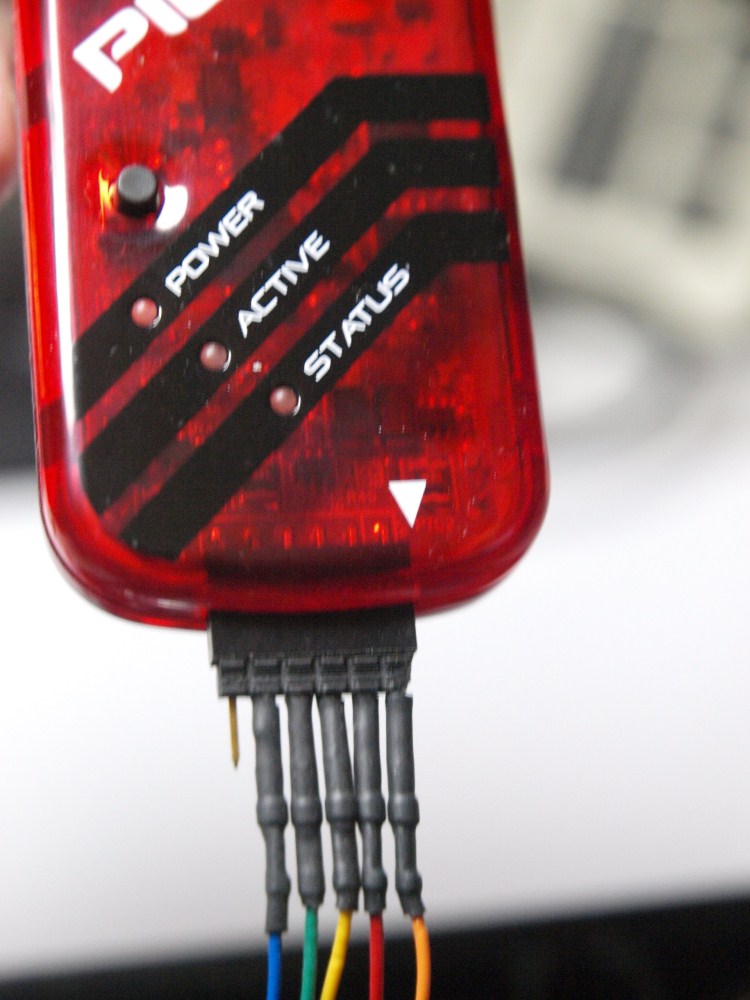
  2. Next solder the wires (the end towards the left  end in Fig 2) in the following order to the 6 pin header.  They will slip easily over one end of the pins of the 6 pin header.  Pin 1 - Orange; Pin 2 - Red; Pin 3 - Yellow; Pin 4 - Green; and Pin 5 - Blue.  Leave pin 6 empty.
  3. Next cut 5 pieces of heat shrink and slide it all the way up the wires to the 6 pin header.  About .7 inches long each. Use a heat source to shrink down the tubing.  I happen to already own a heat gun made for this.  It came from Harbor Freight for $15.00
  4. Now cut 5 more peace's of heat shrink to fit over the other ends, about 1/2 inch long each. Shrink them down.
  5. now cut the fine pins to length.  0.200 inches is about the correct distant.  The pin strip has it pins spaced 0.100 so you can use 2 of these spacing to judge the distant.  You now have your adapter made.
I have found pins from Mouser, Part number 855-M22-2511005 that will fit into the sockets in the main circuit board, but have not made a cable using them. They are similar to the ones pictured above but with 2mm spacing.

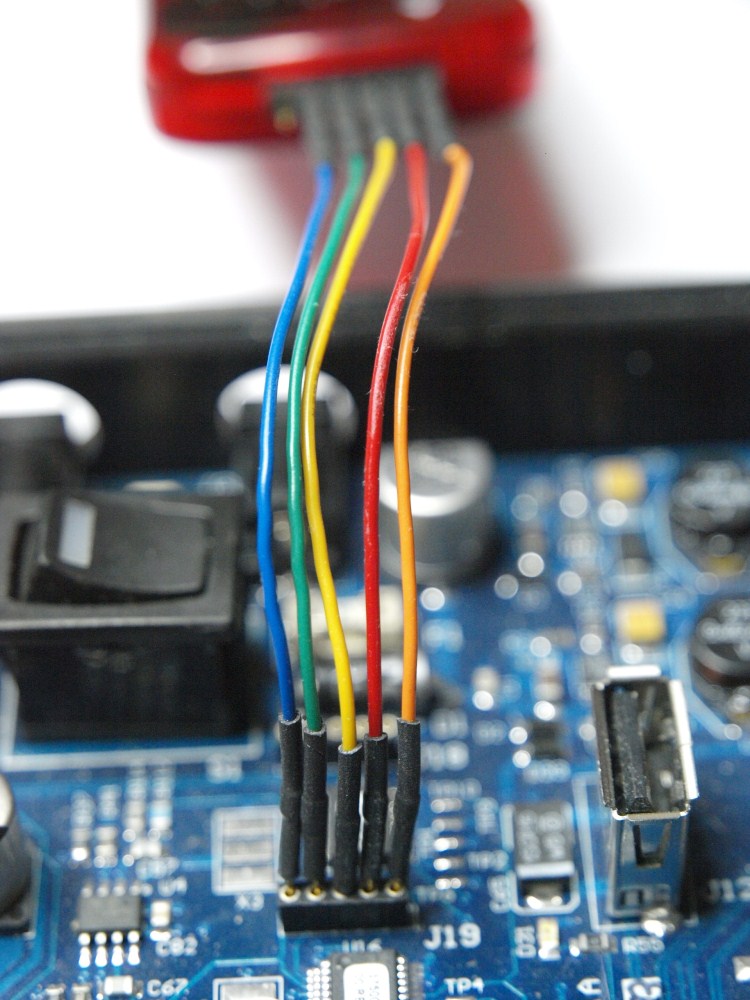
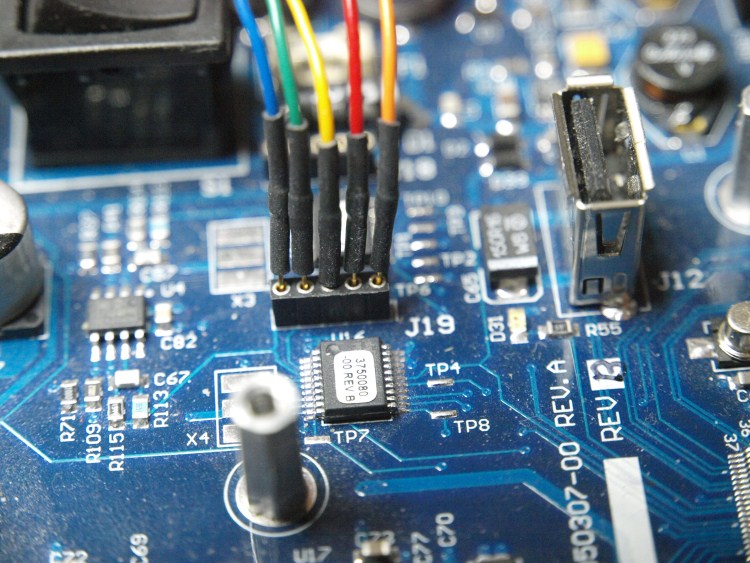
Here are some pictures of the PICKit3 connected to J19 of the Gemini-2

Fig 3

Fig 4

Fig 5
  1. If you have not already installed MPLAB the do so now. After installing it you need to run it.

  2. On the file menu, use the import button and browse to the firmware update for the servo's.  You must use the import function. Using any other function to get the file into MPLAB will not program the servo's correctly. It is available at this link:  Gemini_New_Baseline21.zip that you will import.  If you download it from the link on the left, it will come in as a zipped file called Gemini_New_Baseline21.zip and you will need to put it into a clean folder, and unzip it with a utility such as 7-Zip.  It's filename will be Gemini_New_Baseline21.hex after you unzip it.   It must have the .hex extension for MPLab to use it. Once you have it into MPLAB, in the CHECKSUM window make sure it says 0x251D, if it does not, then you have a corrupted or wrong file.

  3. Next connect the PICkit3 using the supplied USB cable.  A driver should install and tell you that it is ready to use.

  4. Now go to the programmer tab, and select the PICKit3 as the programmer.  If your Pickit3 is like mine, the MPLAB will detect the PICkit3 and tell you there is a software update for it.  Let it do the update.

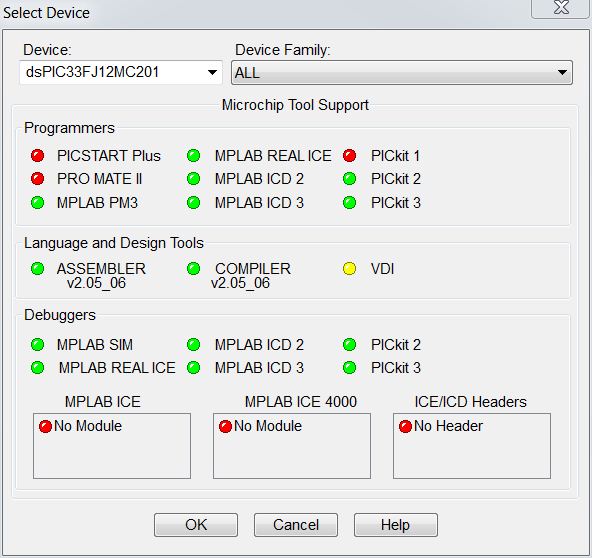
  5. You need to set the PIC type. On the top menu is a button called configure. Select it, and the menu in Fig 5 will come up:

Fig 6
  1. In the top left corner is a device block. Please put dsPIC33FJ12MC201 into it, and then select OK at the bottom.

  2. Now plug in the wires into the Gemini 2 board sockets J18 or J19.  Then plug the 6 pin header into the PICkit3 programmer. You will have to do both J18 and J19.  The pictures shows the pins in J19 which is the DEC servo programming chip.

Fig 7
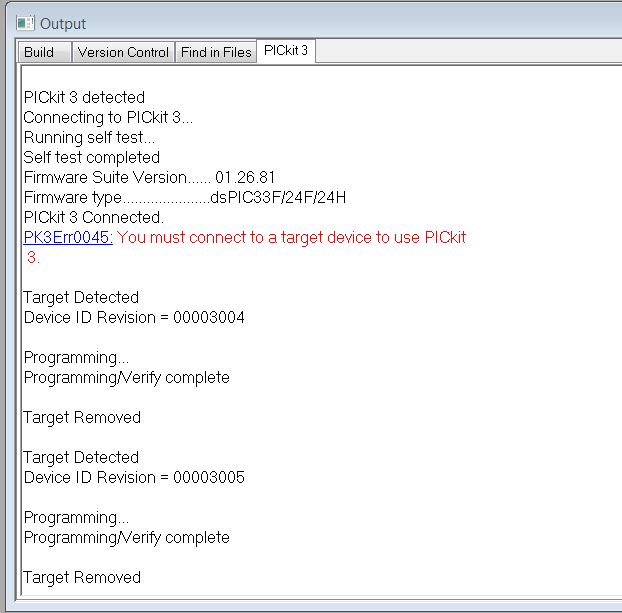
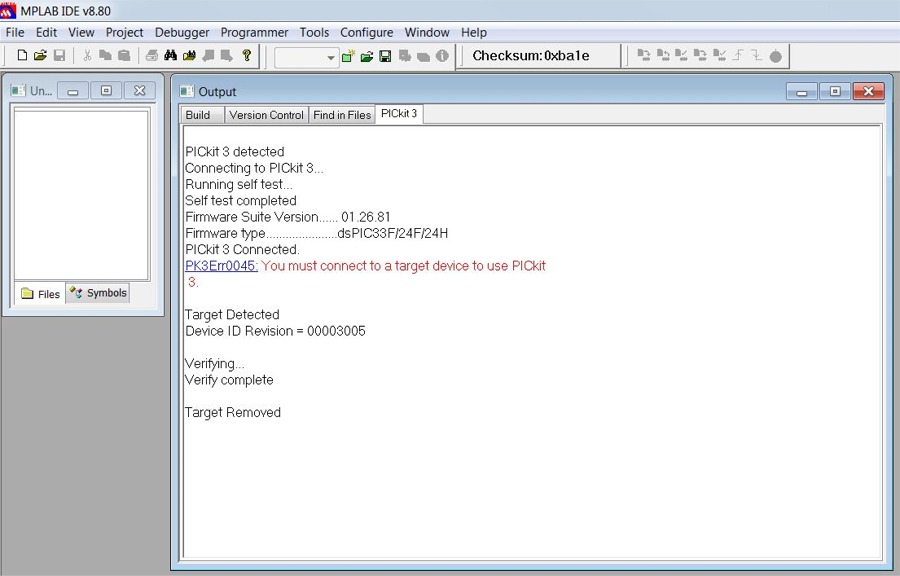
  1. You should see a window similar to the above picture.  It should only be showing up to the red "You must connect a target" 
  2. Power on the Gemini-2.  The line target Detected should appear.  You are ready to program the first device.

Fig 8
  1. The blue arrow in Fig 8 is the programming button.  It will be highlighted. Press it now.  The programmer will program the first device.  It only takes a couple of seconds.  After Programming is complete and verified, Power off the Gemini-2 
  2. Next remove the pins from the Gemini-2 and put them into the other connector (either J18 or J19).
  3. Go to Step 16 and repeat steps 17 through 29.  After step 17 is done for the second connector, Power off the Gemini-2 and disconnect everything.  You are done.

This is what a verified page would look like.
Now after doing this programming to the servo motor IC, if you see either the RA or DEC shaft momentary rotate as the power is turned on, then the following modifications might have to be done to the circuit board.  Note that this modification is not requires on all of the Gemini-2 circuit boards.  Gemini-2 circuit board modification.  If your system shows these symptoms, either before or after the programming of the servo processors, then you need to contact Losmandy to see if they will do the modification for you.   This modifications do not need to be done unless you intend to use PEC.  It will only effect being off on the PEC index.  Synchronizing or aligning of the first star corrects any index error, that an initial motor rotation might cause.   Now only a small percentage of boards have been shown to have this problem.